On this sewing tutorial I’m gonna show you how to make this sanitary pad pouch or cloth pouch pouch without a zipper. It’s a great little stash buster. It’s really quick, I think you can make it in under 20 minutes. If you made it out a waterproof fabric it would be great for cloth pads, or if you wanted to use it for any other things, there’s no reason why it can’t just be a little pouch. For trinkets, toys, little things that you need to pack in your bag. It’s a winner for sure.
If you are looking for more fun projects head over to my patterns shop, there is something for everyone alternatively, I have a collection of free patterns and tutorials.
Materials you'll need to make this no zipper pouch
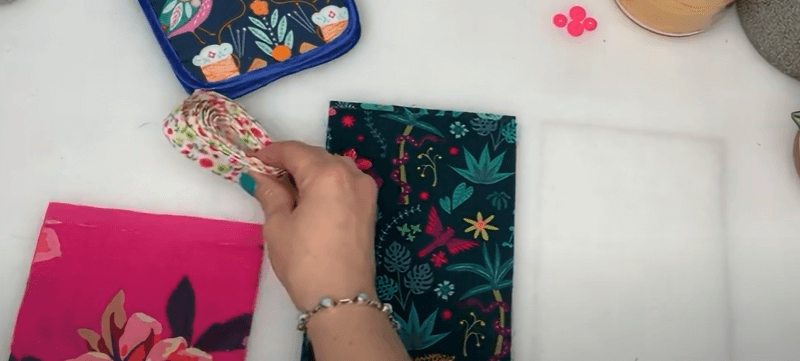
- Main fabric: One rectangle of 10″ x 5″
- Lining fabric: Two rectangles of 5.25″ x 4.5″
- Fusible fleece: One rectangle of 10″ x 5″
- Bias binding: At least 45″ of ¾” wide
- Snap fasteners (or Velcro): To match the fabric color
- Teflon sheet: To protect your iron when fusing the fleece
- Rotary cutter and fricxion pen: For marking and cutting
How to make a no zipper pouch
Please follow along on my Youtube video for tiny details of making this pouch.
Features of this no zipper pouch
This pouch offers several practical features:
Compact yet spacious: Despite its small size, it provides ample space for storing various items.
Flexible use: Ideal for sanitary pads, but also perfect for trinkets, toys, or other small essentials.
Quick and easy: The entire project can be completed in under 20 minutes, making it a great last-minute gift or quick sewing fix.
Durable construction: Built with fusible fleece and bias binding for added durability and structure.
Professional finish: Techniques like using a Teflon sheet and precise stitching ensure a polished look.
Other features
Beyond its core attributes, the Sanitary Pad Pouch includes:
Customizable: You can use different fabrics and snaps to personalize your pouch.
Protective elements: The fusible fleece adds stability and protects the contents.
Easy closure: Snap fasteners (or Velcro) ensure a secure closure, keeping everything in place.
Required sewing skill level
This project is suitable for beginners with basic sewing skills. Here’s what you need:
Basic sewing skills: Familiarity with using a sewing machine and standard sewing techniques.
Binding application: Ability to attach and stitch bias binding around edges.
Snap installation: Experience with adding snap fasteners (or Velcro) for closures.
Beginners will find this project a great way to practice their skills, while more experienced sewers will appreciate the quick, satisfying outcome.
What’s special about this pouch pattern?
The Sanitary Pad Pouch stands out due to:
Flexibility: It can be used for a variety of small items, not just sanitary products.
Ease of construction: The straightforward design and quick assembly make it a practical project.
Customization: Options for personalizing with different fabrics and closures allow for creativity.
Practical sewing techniques: Incorporates simple but effective techniques for a neat finish.
The Sanitary Pad Pouch is a fun and functional project that’s perfect for a variety of uses. Whether you’re making it for yourself or as a gift, its practical design and quick construction make it a winning choice.
Share Your Creations! I’d love to see how your pouch turns out! Whether you use it for sanitary products or repurpose it for other essentials, share your creations with me on Instagram @Studio7t7 or join our community on Facebook. Your creativity inspires me!
If you enjoyed this tutorial, be sure to check out more exciting projects on my YouTube channel. And don’t forget to leave a comment below letting me know what you’ll be using your pouch for or if you have any tutorial requests. Your feedback fuels my creativity!