How to Install Edge Magnetic Clasps
In The July 2024 Bag Maker’s Box, you can find 2 beautiful Edge Magnetic Clasps – But how exactly do you add these to your project?
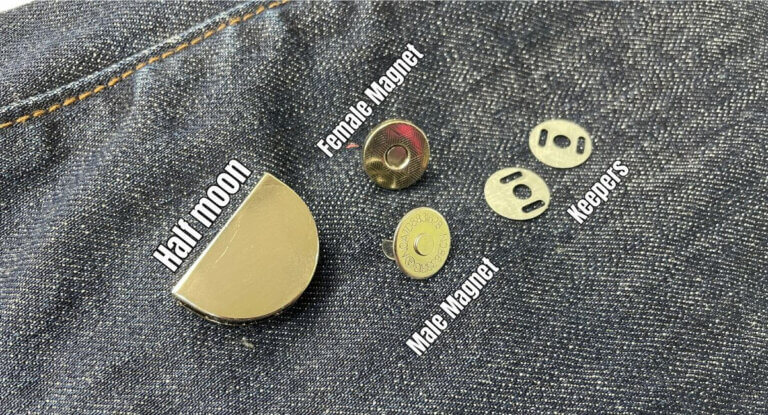
You will find for each clasp:
2 x magnetic parts (Male and Female)
2 x Keepers (A small metal round disc with 3 holes in)
1 x Metal Oval (Which has two parts to it already screwed together).
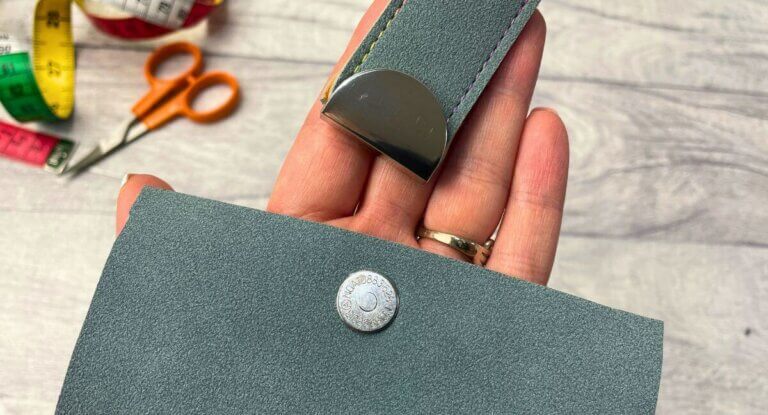
How to Attach A Half Moon Edge Magnetic Clasp
Follow along with the video above, or read on for detailed instructions…
You will also need: A screw driver, small scissors, (optional) fabric marking pen that can be removed eg. a frixion pen) and of course your project.
Optional but recommended: A hole punch, Strong glue like B7000 to secure the screws inside the metal, a small piece of Decovil Stabiliser and a small piece of Gaffa Tape.
- Unscrew the Half Moon Part. (Be sure to keep the small screws safe as they are easy to loose!)
We will now call the Half Moon Part 1 (The textured back) and Part 2 (The shiny front). - Place the female part of the magnet in the recess of the Half Moon Part 1.
- Place one of the keepers on the inside of the Half Moon Part 1, placing the prongs of the female part of the magnet through the holes in the keeper.
- Open the prongs (you may like to use any flat tool to help you), so that they lay flat inside the Half Moon Part 1.
- Place The Half Moon Part 1 to one side. You will attach this at the end of your project.
Attaching The Female Side Of The Magnetic Clasp
6. When it comes to adding the magnetic clasp in your project (usually it is inserted between the two layers), mark on the fabric where your clasp is to go and make two small slits in the outer fabric only.
7. Insert the male part of the magnet clasp so that the magnet is on the facing of the bag that you want to close (often the outside of the pocket).
8. Place the keeper on the back of the clasp, behind the fabric and open the prongs to secure it (again using any flat tool can help with this).
Optional (1): Place some Decovil Stabiliser between the keeper and the fabric for added strength.
Optional (2): Place some strong tape (Gaffa Tape) over the prongs and the keeper to help secure it further.
9. Attach the Half Moon Part 1 and 2 near to the end of the project. Place the Half Moon Part 2 over the edge of the pocket, centred. Press the Half Moon into the outer fabric so that you create two subtle but still visible ‘dents’ from the screw holes. Remove the Half Moon and mark with a pen that can be removed.
Note: You will need to decide when to apply this according to the pattern. If you are able to easily access the inside are of the pocket you can leave it until the end but if you can not easily get to the back you will need to attach it earlier on.
10. Punch two holes where these marks are so that the screw holes/posts can fit into them. You can use a tailors awl or small snips if you don’t have a fabric hole punch, but be sure that the holes aren’t too big. (You can always take off a little more if needed!)
11. Place fray check or clear fabric glue carefully around these holes (is using a fraying fabric like cotton).
12. Place the two parts of the Half Moon, using the two small screws to hold them together.
Optional: Use a small amount of strong glue inside the screw holes to add extra security to the clasp.
And you’re done. It looks like it is probably quite complicated but honestly they go in pretty quickly!
Have fun and don’t forget to share your creations with us in the Facebook Group.
Yours in Sewing, Emma x